How to Cook with a Dutch Oven while Camping
This post may contain affiliate links.
Everything you need to know about using a camping Dutch oven: finding the right size, cooking techniques, temperature charts, how to properly clean, and a whole lot more. If you’re interested in Dutch oven cooking, then this is the place to start!
Without a doubt, a Dutch oven is the most versatile piece of camp cookware you can own. We’ve braised Chicken Marbella, simmered vegetable stews, and even baked apple pie using our Dutch oven. If you’re looking to take your camp cooking to the next level, then you need a Dutch oven.
When we first received a Dutch oven as a gift, we had no idea how to use it. But over the years, it quickly became one of our favorite pieces of camp cooking equipment. Now we can’t imagine camping without one!
So if you’re interested in getting a Dutch oven or want to brush up on your skills, you’ve come to the right place. This guide will walk you through everything you need to know.
Then you can explore our best Dutch oven recipes and start expanding your camp cooking repertoire!

What is the difference between a home Dutch oven and a camping Dutch oven?
Home Dutch ovens have flat bottoms and are sealed in enamel. Popular brands include Le Creuset and Staub. They are designed to be used in a home kitchen, on a stovetop, and/or in an oven. They are NOT designed to be used with a campfire.
Camping Dutch ovens, on the other hand, are made entirely from cast iron, have support legs on the bottom, and a flat flanged lid. Popular brands include Lodge and Camp Chef. They are designed to be used with hot charcoal as well as wood embers from a campfire.
Anatomy of a camping Dutch oven
Handle: An articulating metal bail handle allows a Dutch oven to be easily picked up and moved around. It also can be used to hang the Dutch oven from a tripod over an open fire.
Lid: The lid is relatively flat and has a raised rim around the outside edge. This prevents charcoal from rolling off while cooking and from accidentally spilling ash when removing the lid.
Independent from the Dutch oven, the lid can also be inverted and used as its own cooking surface. Some models have built-in legs on the lid, while others require a small lid stand. The underside of the lid makes for a nice flat, griddle surface.
Body: This is the pot section of the Dutch oven. The bottom and walls are made from cast iron which does an excellent job of retaining and radiating heat.
Legs: Small legs on the bottom of the Dutch oven raise it a couple of inches off the ground. This makes it easier to place charcoals and embers underneath.
Dutch oven sizes
Camping Dutch ovens come in many different sizes. There are two main shapes, shallow and deep, as well as different diameters, which are usually measured in inches.
Shallow: Sometimes referred to as “bread” ovens, shallow Dutch ovens are best for baking because the lid is closer to the food on the inside. In our opinion, shallow Dutch ovens are also the most versatile version and allow you to cook any recipe.
Deep: These deep Dutch ovens are best for large quantities of soups, stews, and braises. Since the lid is farther away from the food inside, it doesn’t brown the top of baked goods as well. But the increased volume is great for feeding a large crowd.
Diameter: The most common diameters we’ve seen are 10” and 12”. Occasionally we see small 8” inches or really big 14” inchers.
What size should you get?
If you are going with a shallow Dutch oven (the most versatile option, in our opinion), then this is a good estimate of how many servings you can get out of each diameter:
| Diameter | Capacity | Serving Size |
|---|---|---|
| 8 inch | 2 quarts | 2-3 people |
| 10 inch | 4 quarts | 2-6 people |
| 12 inch | 6 quarts | 6-10 people |
| 14 inch | 8 quarts | 8-16 people |
For example, we have a shallow 10” Dutch oven that has been great for the two of us, but still has enough space to scale up to serve four people. For side dishes like cornbread or desserts, we can make about 6 servings in a 10” oven.

How to cook with a Dutch oven
Using a Dutch oven, you can sauté, simmer, braise, sear, fry, and bake – if you can imagine it, you can make it!
Simmer, boil, steam: On a basic level, a Dutch oven is just a heavy-duty pot with a lid. So any cooking method that can be performed in a typical pot, can be done in a Dutch oven as well. Think simmering soups, steaming rice, boiling water for pasta, etc.
Sear, pan-fry, sautee: A camping Dutch oven is also a great stand-in for a cast-iron skillet. Anything that can be cooked in a cast-iron skillet can be done in a Dutch oven too, like searing steaks, browning chicken thighs, sauteing vegetables, etc. We find the high sides help prevent grease from splattering.
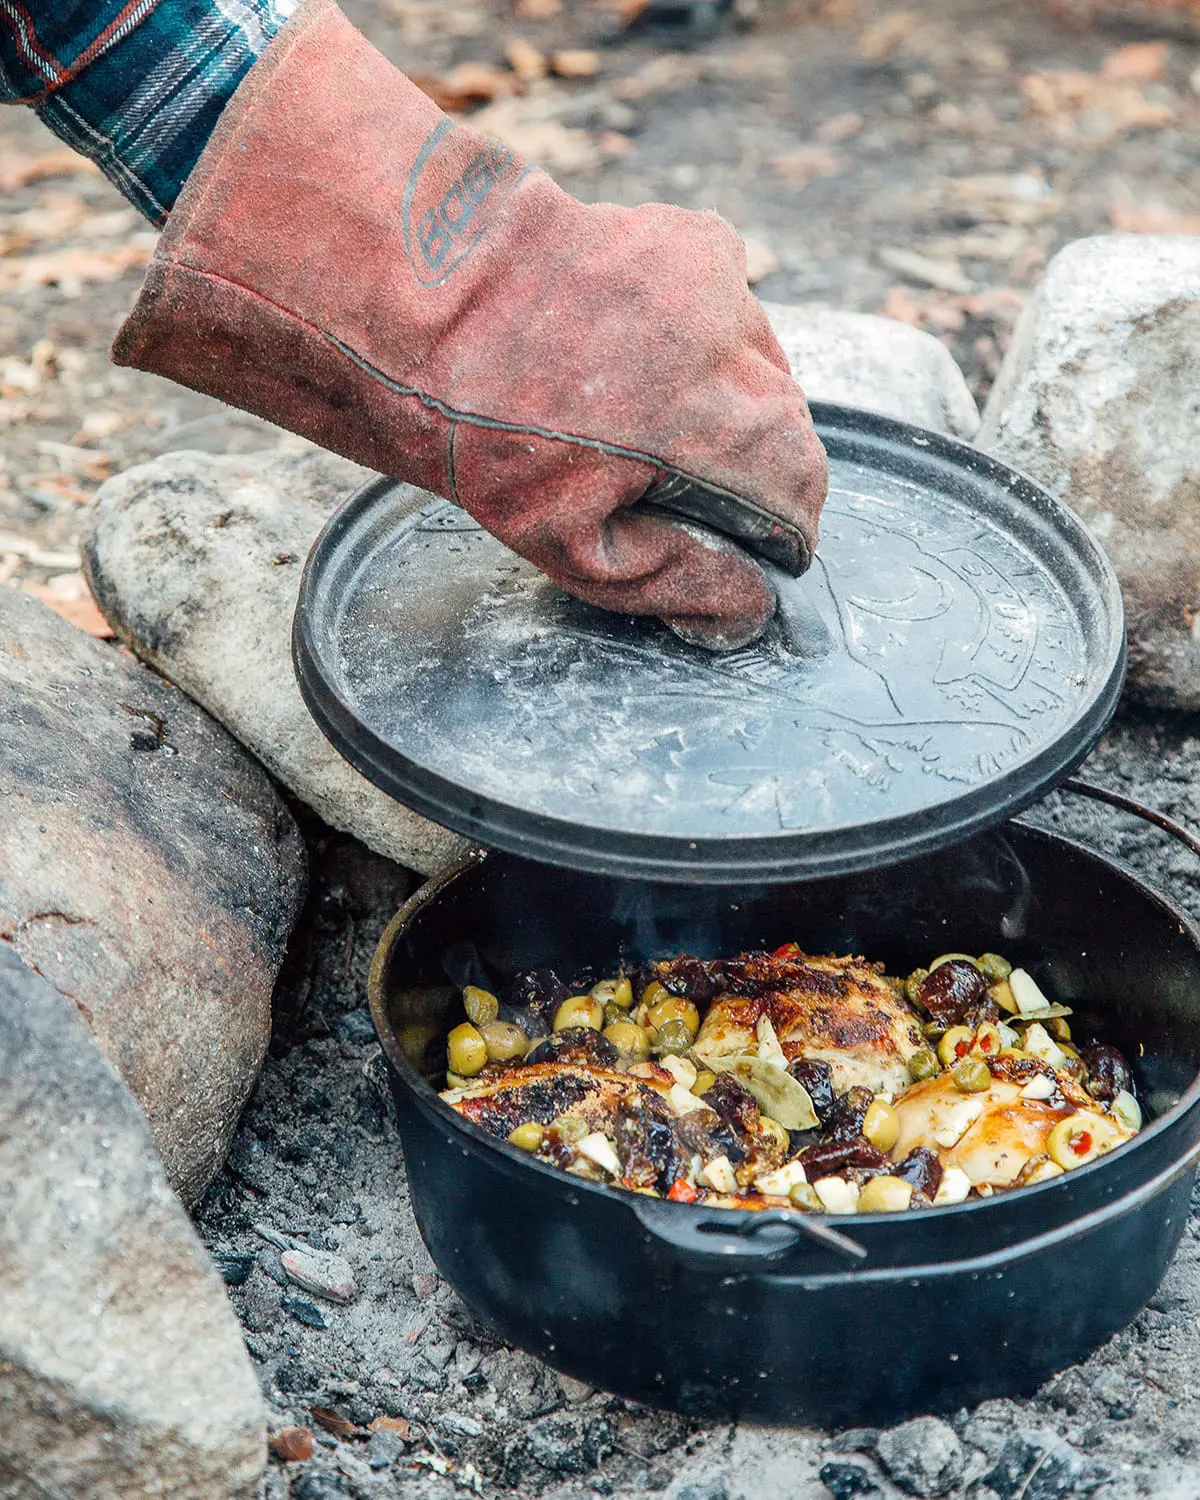
Baking: The real advantage of a camping Dutch oven is its ability to function like… an oven. By placing hot coals on the lid and underneath the body, the interior of the Dutch oven is heated equally. This allows you to bake things like biscuits, scones, and pies.
Braising: Similar to baking, braising requires dual-direction heating as well. Food is cooked in a small amount of liquid which is trapped by the lid of the Dutch oven, creating a moist, “low and slow” cooking environment.
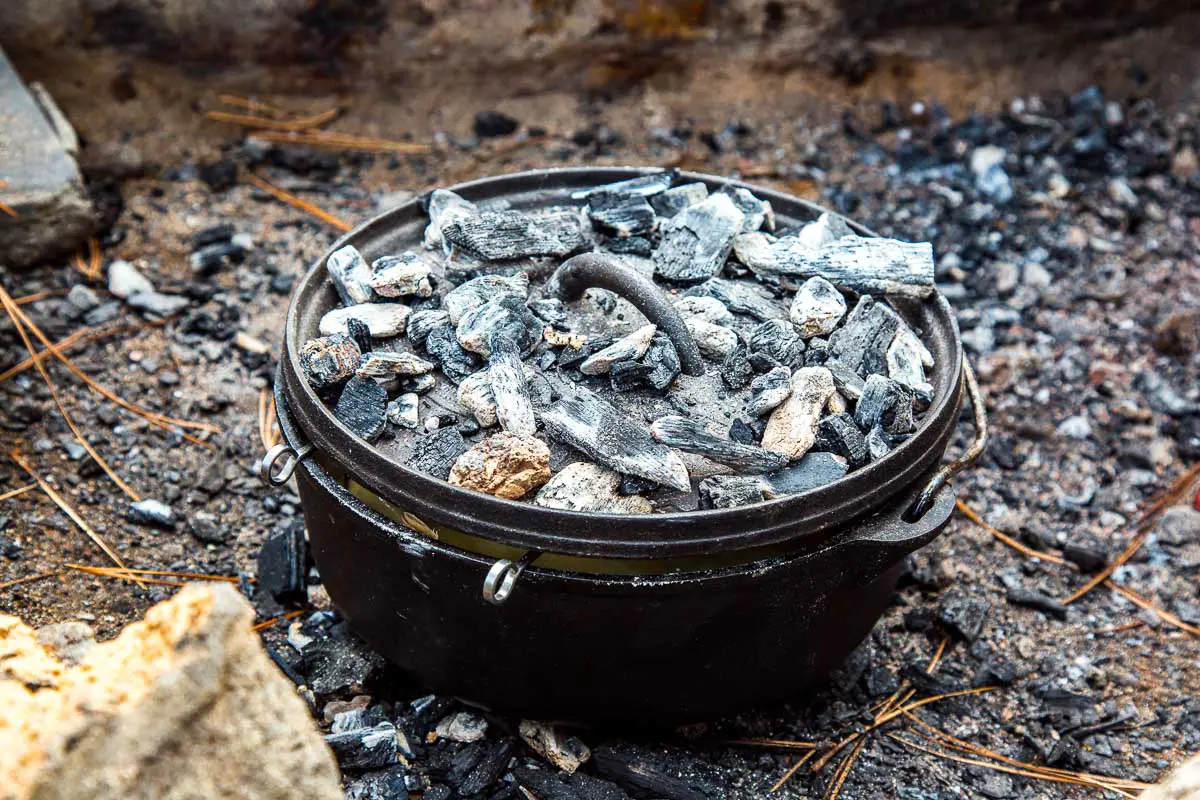
Dutch oven heating methods
Camping Dutch ovens were primarily designed to use hot coals or wood embers, which are placed underneath the pot and on the lid. This dual-direction form of heating is the only way you can bake or braise with a Dutch oven.
Dutch ovens can also be suspended over a campfire using a tripod, placed on a campfire cooking grate over a fire, or placed directly on top of embers.
Depending on your stove, it is also possible to use a Dutch oven on a camp stove. Our Dutch oven’s legs fit in between the grates covering our camp stove’s range. This is a useful feature when camping in areas with seasonal fire bans.
Charcoal or embers?
If you’re using your Dutch oven to bake or braise, you will want heat coming from the top and the bottom. And to do that, you will need to use either charcoal or wood embers.
Charcoal Briquettes: The consistent shape of briquettes make it easier to evenly distribute heat. You can use a temperature chart (see below) to roughly estimate the number of charcoal briquettes you will need on top and bottom to achieve a certain temperature.
Lump Hardwood Charcoal: Less processed than briquettes, lump charcoal is irregularly shaped, making it more challenging to formulaically determine equal heat distribution. While lump charcoal lights faster, we find it doesn’t have the staying power of briquettes. So you may need additional lump charcoal to replace midway to maintain temperature.
Wood Embers: You can also use embers from your campfire to heat your Dutch oven. However, the quality of the embers will be determined by the type of wood you’re burning. Softwoods, like the pine typically sold at campgrounds, produce weak embers that die out quickly. Hardwoods like oak, almond, maple, and citrus produce embers that last much longer.
What do we prefer? If we have a choice, we prefer to use briquettes, but we’ve used all the options listed above with success.
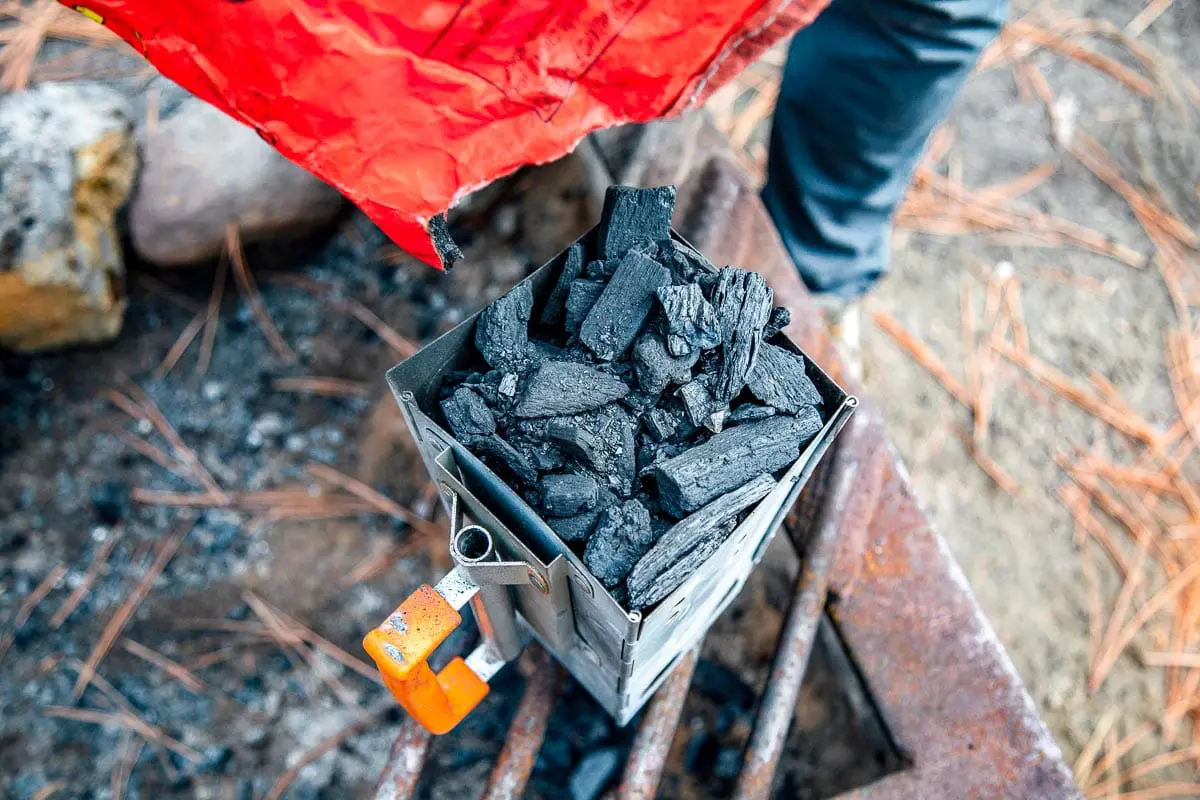
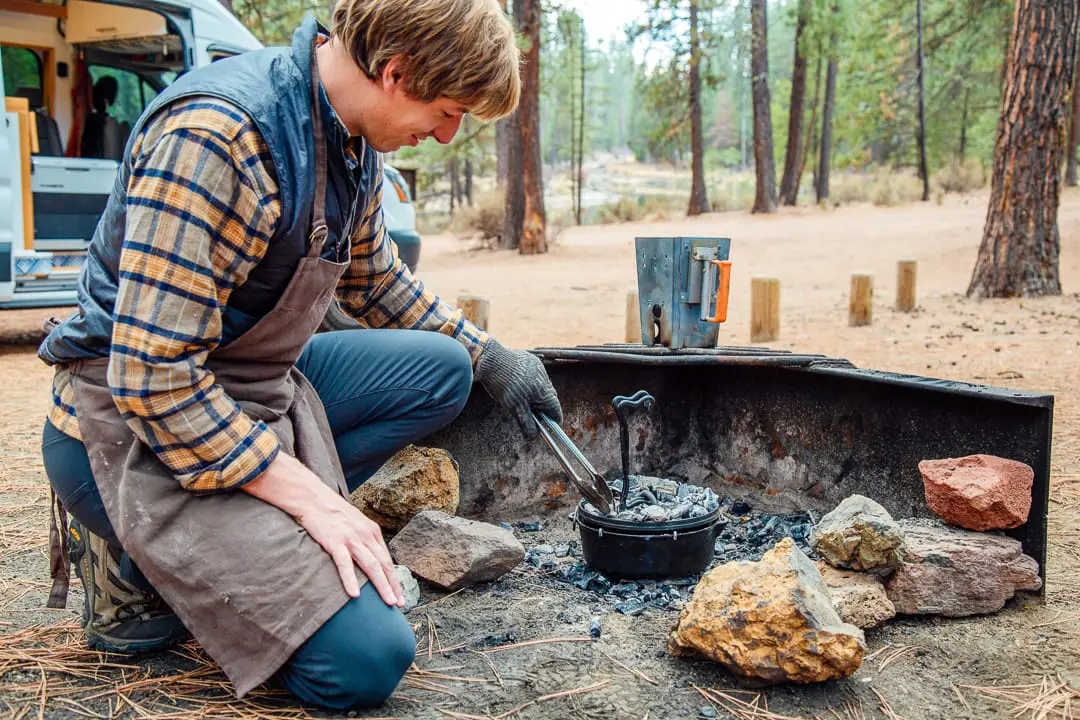
How to use a chimney starter (for charcoal)
You can use lighter fluid or match-light coals to start your charcoal, but we prefer to use a chimney starter instead.
They make lots of different models of chimney starters, but when we’re camping we like to use this collapsible chimney which packs flat for easy storage.
We fill the top section with charcoal and place crumpled-up paper or kindling in the lower section. We light the paper on fire, the flames are drawn up through the charcoal, and after about 15 minutes the charcoals are lit.
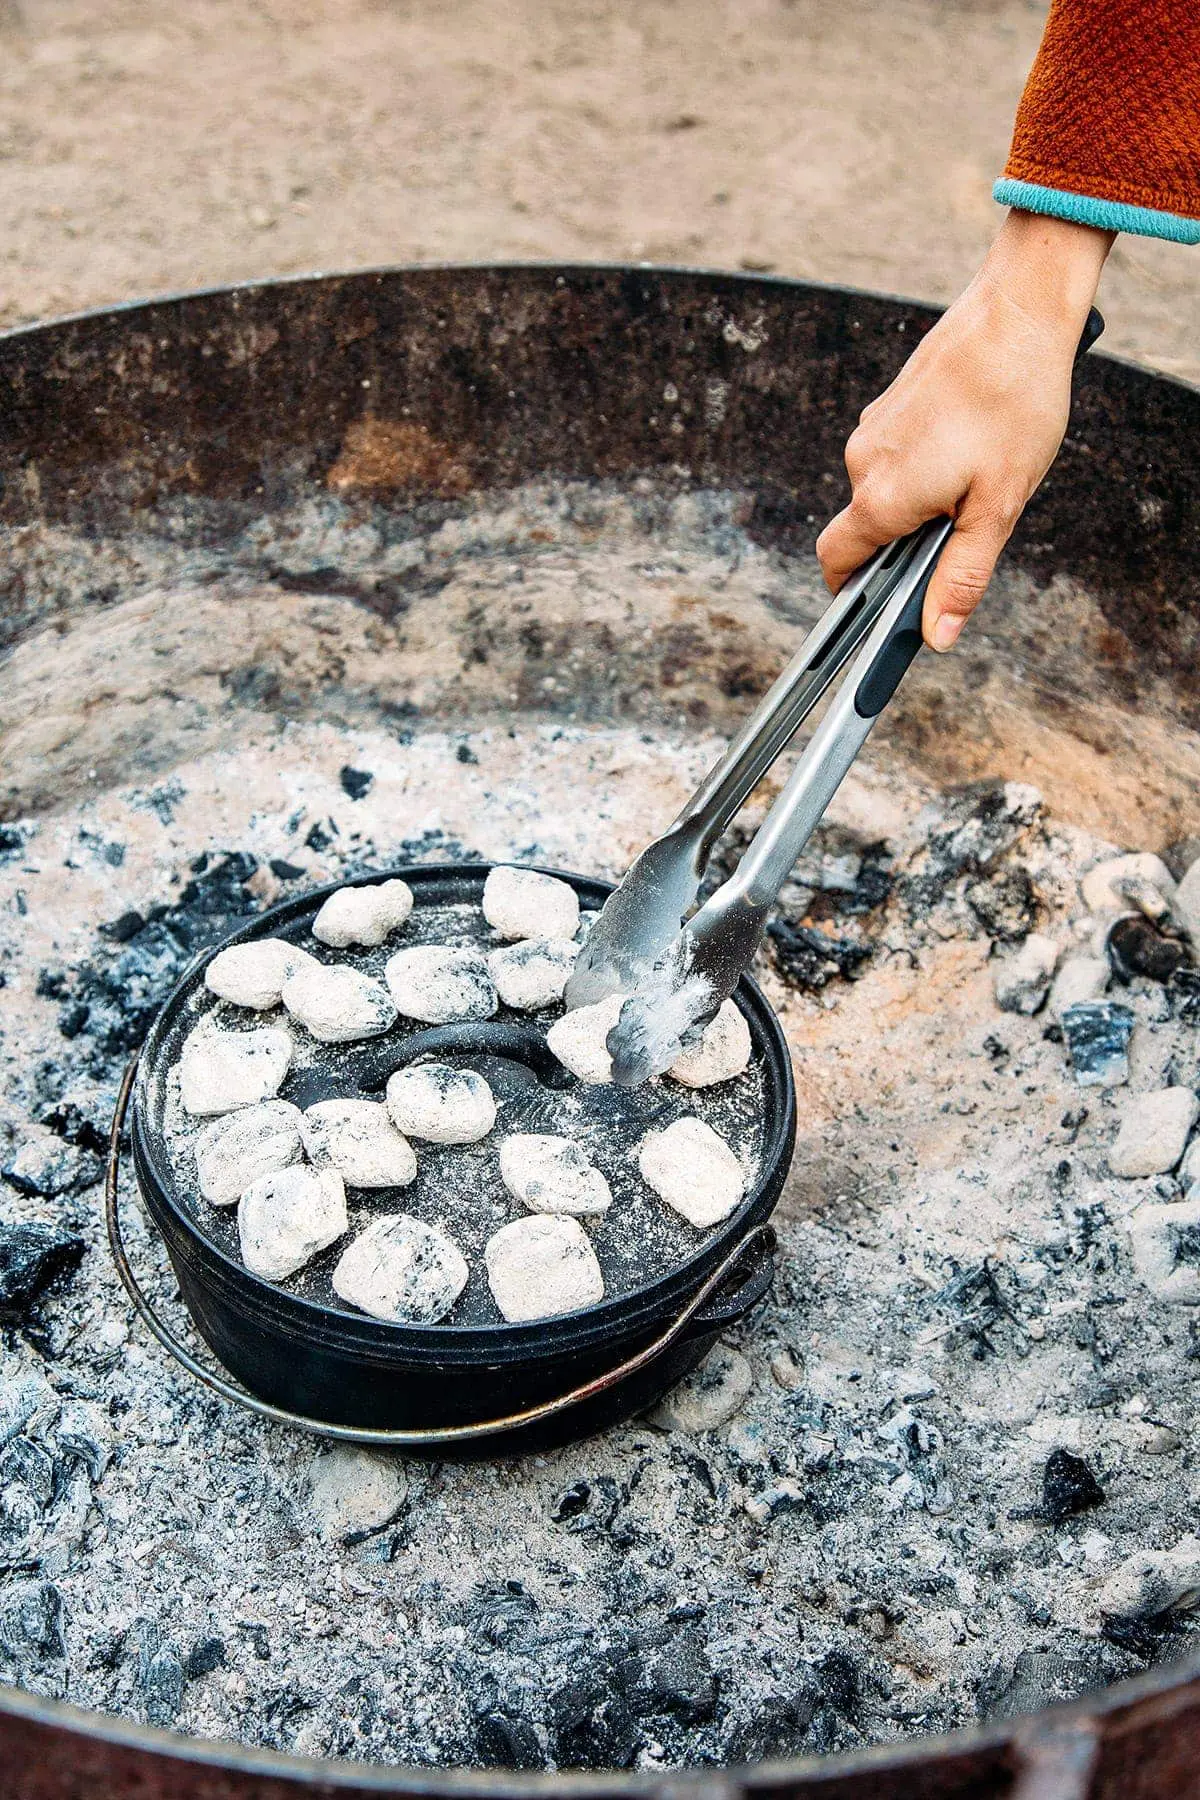
Determining temperature
Most baking in a Dutch oven is done at 350F. For 10″ and 12″ ovens, a quick way to figure out how many charcoal briquettes you will need to achieve this temperature is to double the diameter of your Dutch oven and add one. So, for example, if you have a 10” Dutch oven, you will need about 21 briquettes for 350F.
As for the ratios, you want about ⅓ of the coals on the bottom and ⅔ of the coals on top. So for that example above, you would want 7 coals on the bottom and 14 on top.
While this is a good rule of thumb, it is by no means exact. Outside air temperature, the type of charcoal, and the volume of the food will all affect the temperature.
If you really want to know the exact internal temperature of your Dutch oven, we recommend getting an instant-read probe thermometer. However, with a little experience, you can assess the temperature by hovering your hand over the coals and feeling the heat radiating off. There is a bit of a learning curve to this, but with practice, you’ll get there. Until then, this chart is a good place to start.
Dutch Oven Temprature Chart
| Temp | 8″ Oven | 10″ Oven | 12″ Oven |
|---|---|---|---|
| 325°F | 15 coals 10 lid 5 under | 19 coals 13 lid 6 under | 23 coals 16 lid 7 under |
| 350°F | 16 coals 11 lid 5 under | 21 coals 14 lid 7 under | 25 coals 17 lid 8 under |
| 375°F | 17 coals 11 lid 6 under | 23 coals 16 lid 7 under | 27 coals 18 lid 9 under |
| 400°F | 18 coals 12 lid 6 under | 25 coals 17 lid 8 under | 29 coals 19 lid 10 under |
| 425°F | 19 coals 13 lid 6 under | 27 coals 18 lid 9 under | 31 coals 21 lid 10 under |
| 450°F | 20 coals 14 lid 6 under | 29 coals 19 lid 10 under | 33 coals 22 lid 11 under |
For recipes with cook times longer than 30 minutes, you will need to add fresh coals midway through the cooking process to maintain a consistent temperature. So be sure you have a fresh batch ready when the time comes.
Managing the heat
Just like home grilling, a lot of Dutch oven cooking centers around heat management. How hot are your coals? Where is the heat going? And how long will that heat last?
Wind shelter
One of the biggest challenges when doing any type of cooking outdoors is the wind. Windy conditions will steal heat from your coals and cause them to burn out quicker. So, it’s advisable to try and buffer the wind as much as possible.
Rock wind shelter: A small, semi-circle rock shelter is quick to construct and can be very effective against the wind.
Fire ring: If cooking at an established campground, it’s easiest (and safest) to use your Dutch oven inside the provided fire ring. Which also doubles as a wind shelter.
Dutch oven table: If you’re serious about Dutch oven cooking, they make metal table tops with wind blockers. This also allows you to work standing up, rather than hunching down on the ground.
Rotating the lid
One way to prevent hot spots and ensure your food heats evenly is to rotate the lid and body of the Dutch oven about every 15 minutes. Using the handle, rotate the body of the Dutch oven a quarter turn. Using a lid-lifter or heat resistant gloves, lift the lid slightly and rotate a quarter turn in the opposite direction.
Stacking multiple Dutch ovens
If you have multiple Dutch ovens and limited coals, you can stack them on top of one another. This stacking method allows you to use the top coals of the bottom Dutch oven as the bottom coals for the top Dutch oven. (Trust us, it makes sense when you see it)
Obviously, you should start with the Dutch oven with the widest diameter on the bottom.
While Dutch oven stacking can be really fun, be prepared to throw the coal ratio chart out the window. The right number of coals on top for the bottom Dutch oven is the wrong number of coals on the bottom for the top Dutch oven. The whole thing gets way too messy to figure out in a formula.
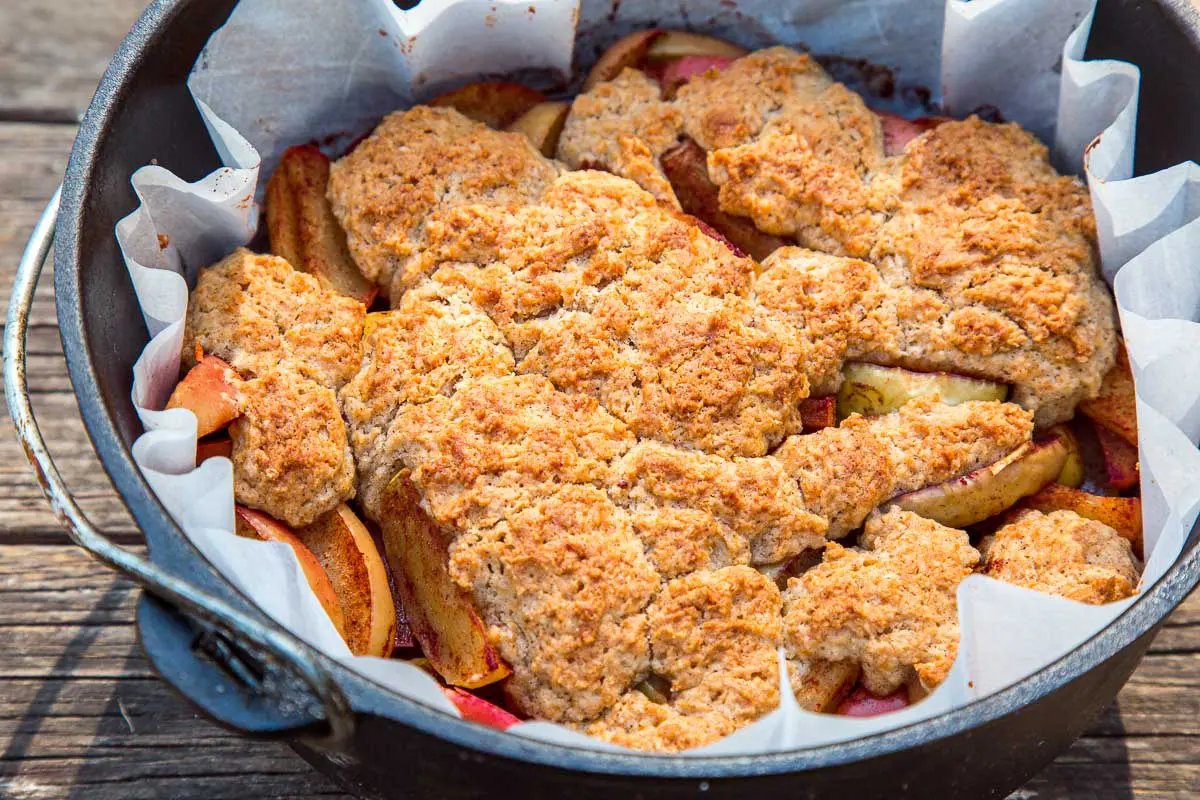
Baking in a Dutch oven
By far, the biggest perk of owning a Dutch oven is the ability to bake! It’s so much fun to make fresh bread, pies, and biscuits at a campsite. However, there are few challenges to baking in a Dutch oven you should know about before you get started.
Unlike a home oven that is vented, a Dutch oven, with the lid on, is a sealed system. So any moisture will turn into steam and become trapped inside. This steam can inhibit proper browning and prevent baked goods from getting a nice golden crust.

1. Metal skewers to release steam: One way to prevent steam from building up is to lay long metal kabob skewers across the top of the Dutch oven to create a small gap between the body and the lid. This tiny gap allows steam to escape without letting too much heat out.
You can also release some of the steam by periodically lifting the lid about ¼ inch. We do this when rotating the lid.
2. Parchment paper with straps: Due to the high sides of the Dutch oven it can sometimes be hard to remove baked goods like pies or bread. Our solution is to cut out a circular piece of parchment paper and run folded pieces of parchment paper underneath it as straps that we can use to lift the food out.
Using a Dutch oven over a campfire
Most firepits at established campgrounds have adjustable grill grates, which can be used to elevate your Dutch oven over a fire. The only trick is positioning it so the legs fit through the grate.
For long simmers like chilis or stews, it can be useful to hang your Dutch oven over an open fire using a tripod. A simple chain and S-hook will allow you to adjust the height of the Dutch oven over the fire, so you can dial in the heat.
Using a Dutch oven on a camp stove
If you just want to use your Dutch oven as a pot, you will most likely be able to use it on any standard two-burner camp stove. Most camp stoves have an elevated grate, which will allow the legs of the Dutch oven to hang down.
We use a Camp Chef Everest 2x camp stove and frequently use our 10” Dutch oven with it.
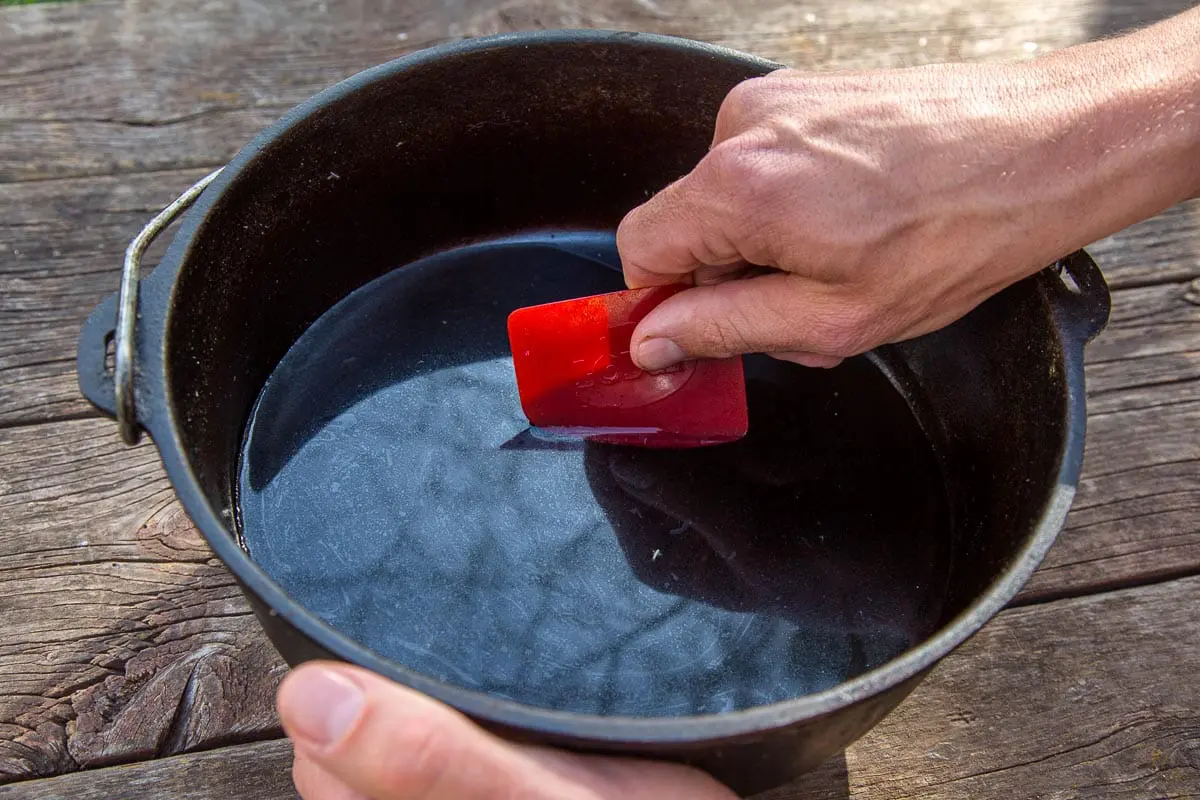
How to clean and maintain a Dutch oven
The procedure for cleaning a Dutch oven is the same as any other piece of cast iron cookware.
The best cleaning technique we’ve found for cast iron is to use a plastic scraper with a little bit of warm water. We use this one from Lodge.
Firmly scrape around the interior of the Dutch oven, dislodging any rough patches where food might be stuck. Unlike the scouring side of a sponge or brush, a plastic scraper allows you to cleanly remove hardened food debris without any risk of damaging the seasoning.
Once the interior is smooth (no more rough patches), rinse with warm water and then dry completely. We like to place it over the heat again to ensure it’s completely dry.
Then we add a dime-sized drop of grapeseed oil and rub the interior down with a paper towel until it is evenly coated.
How to reseason a Dutch oven
If your Dutch oven is in really bad shape (i.e. exposed bare metal, rust spots) or you picked up a used one that needs some TLC, then we recommend doing a complete reseasoning. Unlike the cleaning and maintenance instructions above, you will probably want to perform a complete reset.
Read more about the process in this article detailing how to season cast iron cookware.
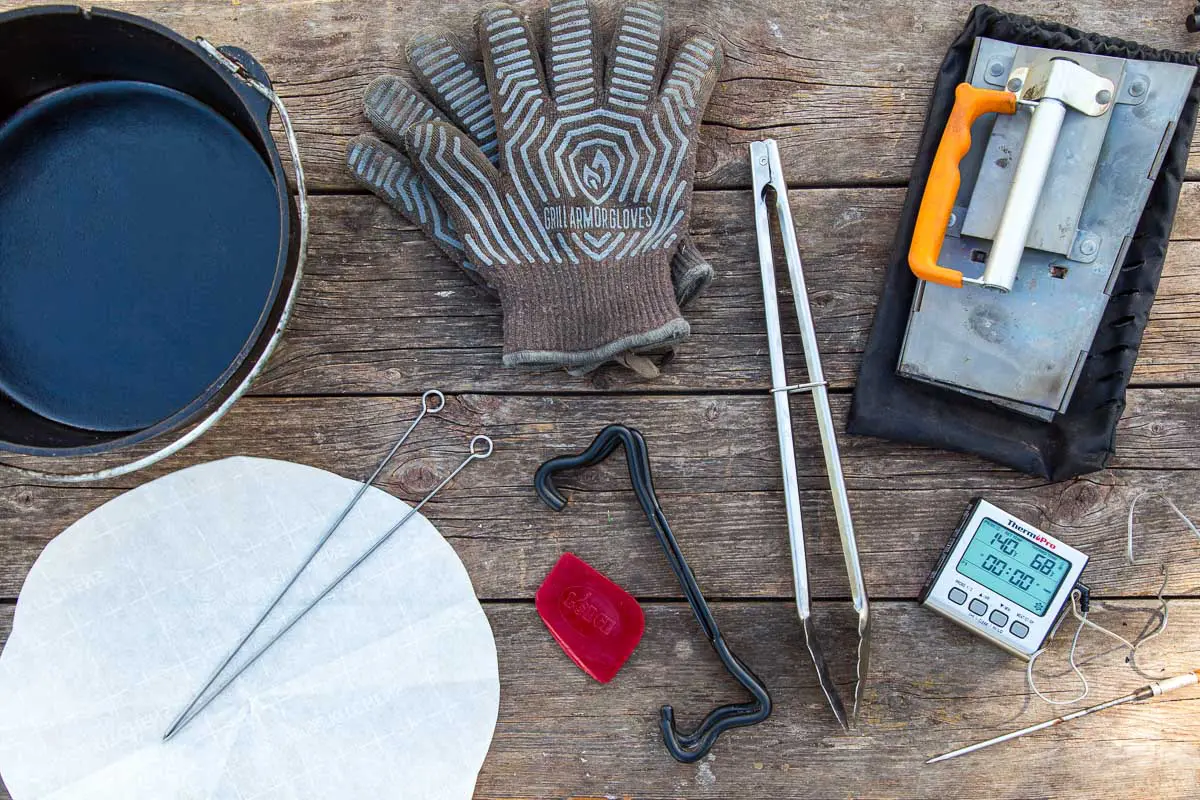
Useful accessories
While they aren’t completely necessary, there are a variety of accessories that make cooking with a Dutch oven a little easier.
↠ Charcoal Chimney: Ditch the lighter fluid! A charcoal chimney is a quick way to get your coal lit. This collapsible version is great for camping because it lays flat and comes in a durable storage bag.
↠ Lid Lifter: A lid lifter can be really handy. We own this 4-in-1 lid lifter from Lodge, which functions as a lid-lifter, bail hook, pot stand, and lid stand. It folds up and fits inside our 10” Dutch oven.
↠ Heat Resistant Gloves: We’ve tried a lot of different welding mitts, and these heat resistant grill gloves are far superior.
↠ Metal Tongs: If you’re using charcoal briquettes, a pair of long metal tongs will allow you to move and reposition them with ease.
↠ Shovel: If you’re using lump charcoal or campfire embers, it can be helpful to have a small metal shovel to move things around.
↠ Instant Read Thermometer: If you’re interested in knowing the exact temperature of the interior of your Dutch oven, or to monitor the internal temperature of any meat you’re cooking, an instant-read probe thermometer is invaluable. Most Dutch ovens have a small notch cut out where the probe can be inserted.
↠ Metal Skewers: If you’re doing any baking, you will want a way to release the steam that builds up inside the Dutch oven. A few metal skewers between the body and the lid create just enough of a gap to let the steam out without losing too much heat.
↠ Tripod: If you frequently camp in areas that don’t provide grates over the campfire, you may want to pick up a tripod to hang your Dutch oven over the fire. This will allow you to adjust the height dial in the heat for a perfect low simmer.
↠ Pot Scraper: A small plastic pot scraper is by far the best method we’ve found for cleaning cast iron (and we’ve tried them all!)
↠ Liners or Parchment Paper: One of the secrets to easier Dutch oven baking is to use liners where possible. You can pick up single-use, pre-cut liners, but we prefer to make them ourselves out of parchment paper.
Dutch oven recipe ideas
Now that you know how to use a Dutch oven, you’ll want to try out a bunch of new recipes! Here are a few of our favorites on Fresh Off The Grid:
↠ Dutch Oven Chili
↠ Dutch Oven Cobbler
↠ Dutch Oven Enchiladas
↠ Dutch Oven Banana Bread
↠ Dutch Oven Pizza
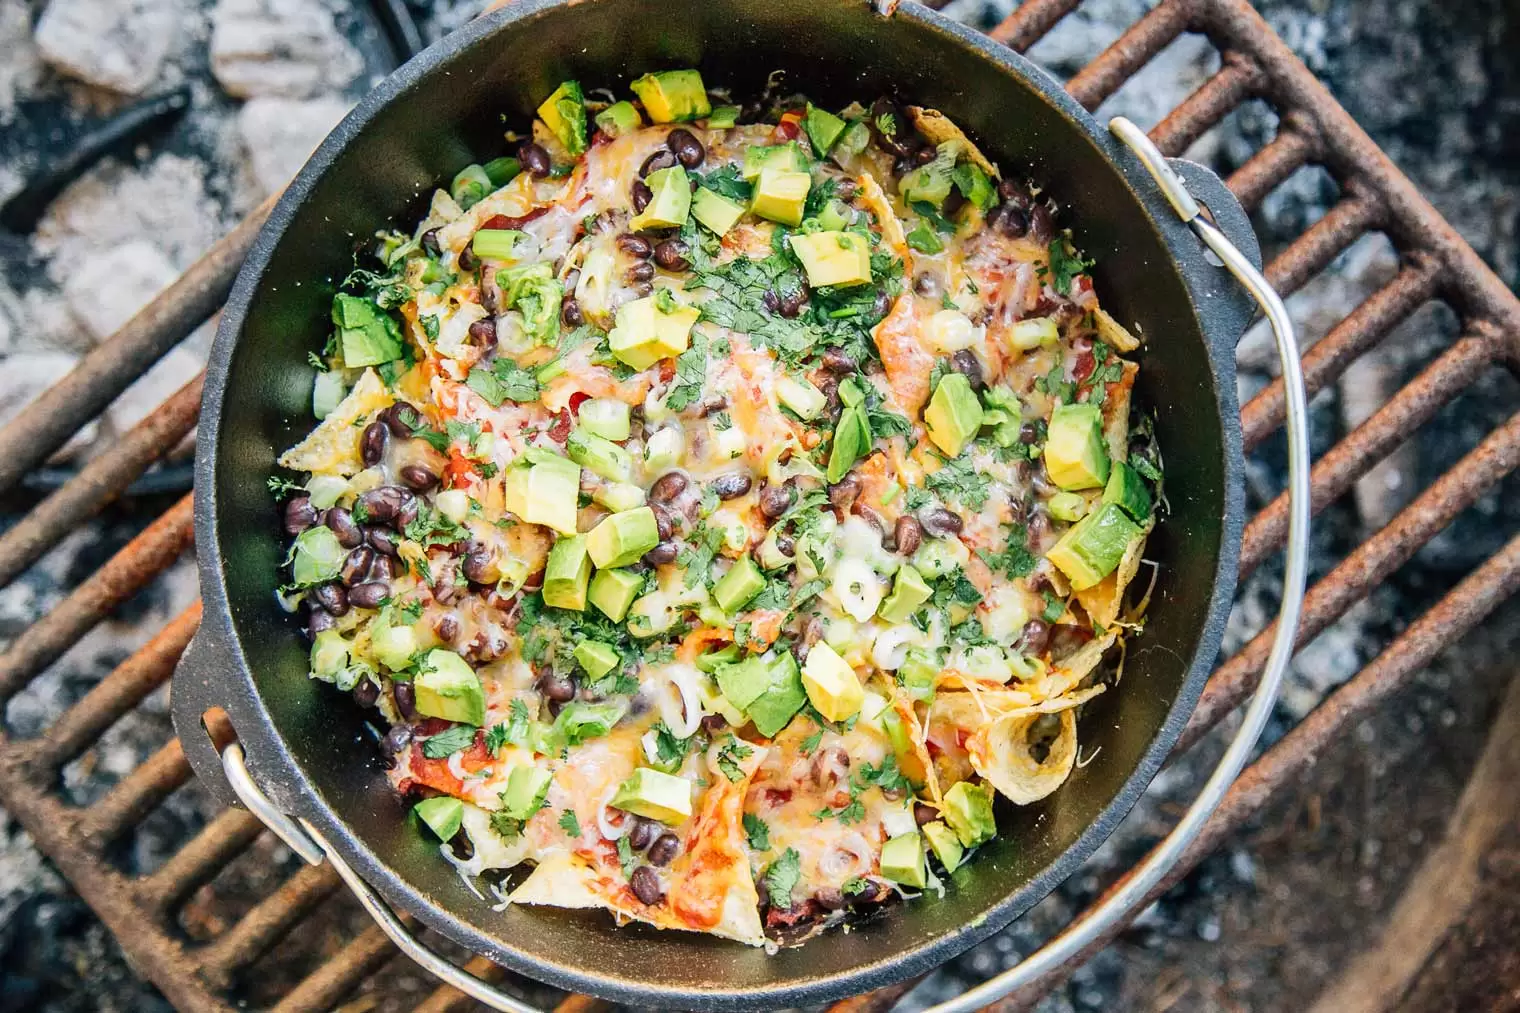
↠ Campfire Nachos
Here you’ll find a whole round-up of the best Dutch oven recipes for camping on our site and around the web.
This is exactly the website I’ve been looking for online. Hopefully there’s a scallop potato one . I’ve done it before but it’s been awhile. Conversion chart for briquettes to use is a must. Thank you. JF